The Raspberry Pi, in general, is associated with Linux operating systems like Raspberry Pi OS, Ubuntu, etc. How about installing a Microsoft Windows OS on your Raspberry Pi? Well, that would be a cool thing, right? The only Windows operating system supported by Pi is the Windows 10 IoT Core. But it’s not a full-fledged desktop OS. But as long as we have a vibrant community of Raspberry Pi developers, we’ll get a quick workaround for almost anything. The case is not different in the latest Windows 11 OS. Developers have managed to install Windows 11 on Raspberry Pi, and that too is the full-fledged desktop version.
As of now, only the official insider preview build of Windows 11 is available for download, and it’s found pretty nice when installed on Raspberry Pi. In this article, I’ll break down the process to install Windows 11 on Raspberry Pi for you. So without further ado, let’s get started.
Requirement
- Raspberry Pi 4
- Raspberry Pi 4 Power Supply
- MicroSD card (32 GB recommended)
- Ethernet Cord or WiFi Dongle
- USB Keyboard and Mouse
How to Install Windows 11 on Raspberry Pi 4
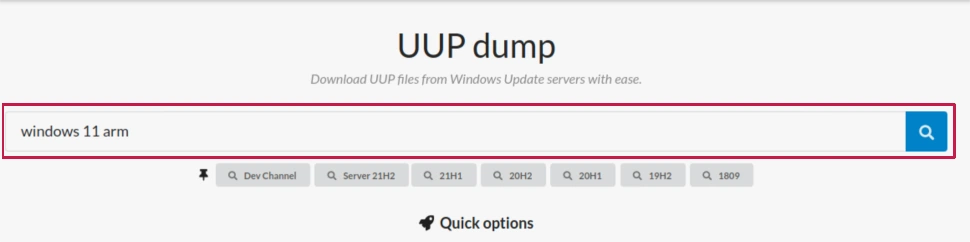
- First off, to install Windows 11 OS on your Pi, you need to create an installation image. For that, head to UUPdump.net and search for “Windows 11 arm”.
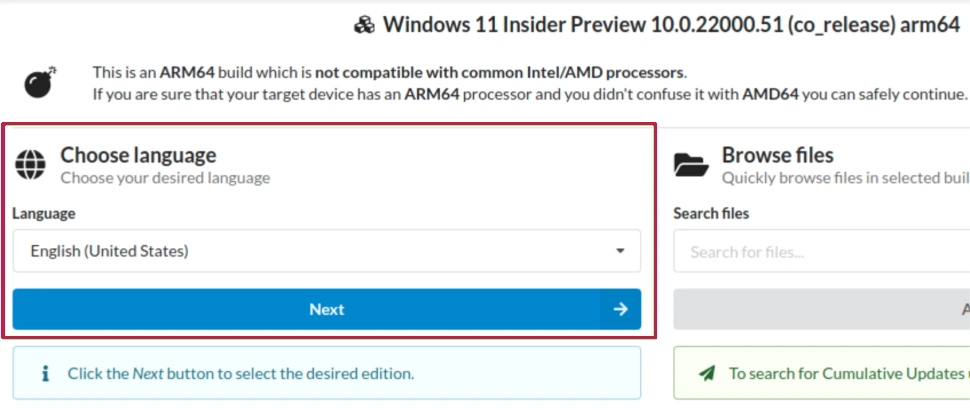
- Now, select the latest build for arm64.

- Choose your preferred language, Windows 11 edition, and then click Next.
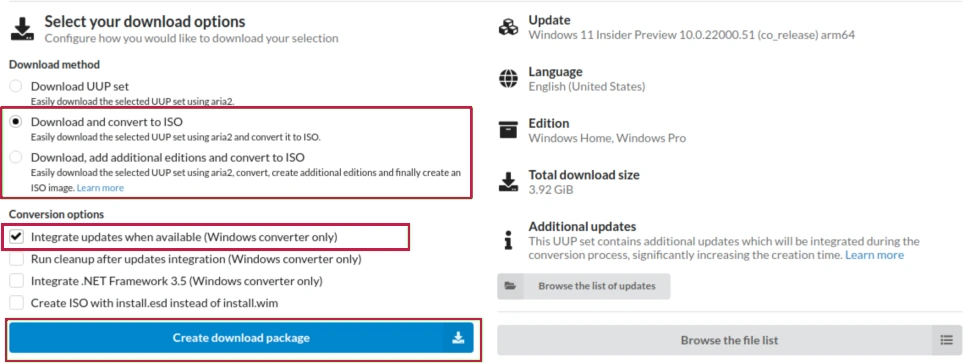
- On the next screen, choose Download and convert to ISO and click Create download package.
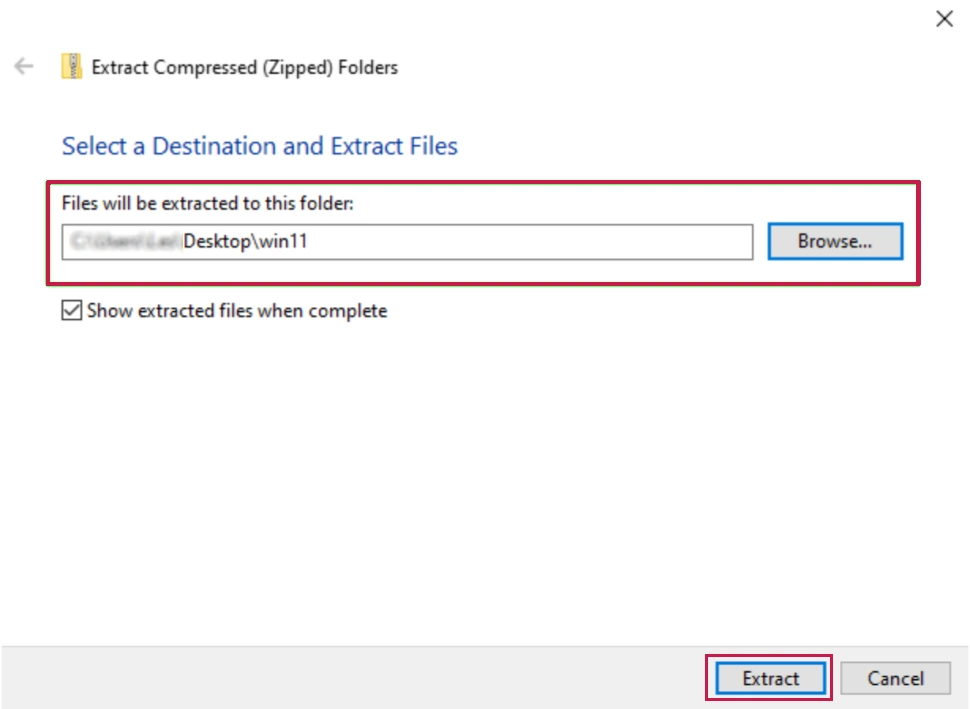
- Once you download the file, extract the contents into a folder named say “Win11”.
- Browse into that folder and double-click on the uup_download_windows.cmd file. If you are presented with a warning message, just click on “more info” and then allow it to make necessary changes on your device.
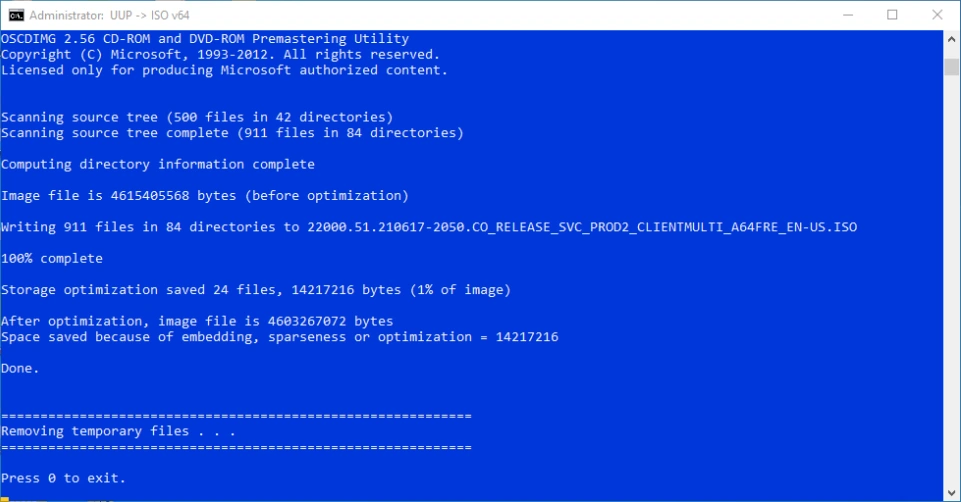
- The command prompt windows will now open and run some codes to download the ARM image and create an iso file. Note that the process may take a while. So be patient.
- Once it completes the process, type 0 to close the CMD window, you will now get an ISO file that you can flash onto your SD card.
- Now, plug your microSD card into your computer. And make sure that the card is detected and listed on ‘This PC’. It will erase all your data on the card. So make sure that you’ve taken a backup of the files.
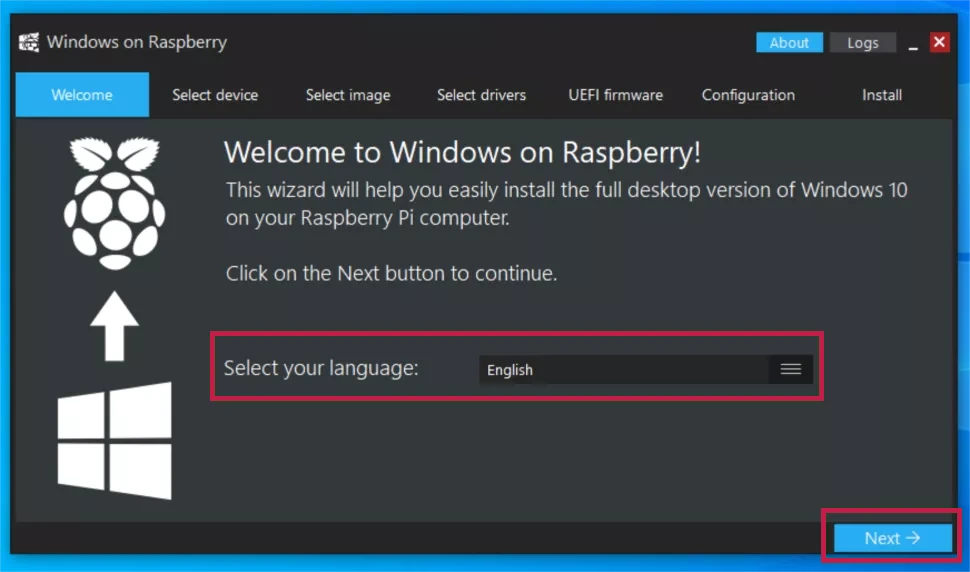
- Download the WoR imager tool and extract the contents into the “Win11” folder you’ve made before.

- Launch the tool, set your preferred language, and click Next.
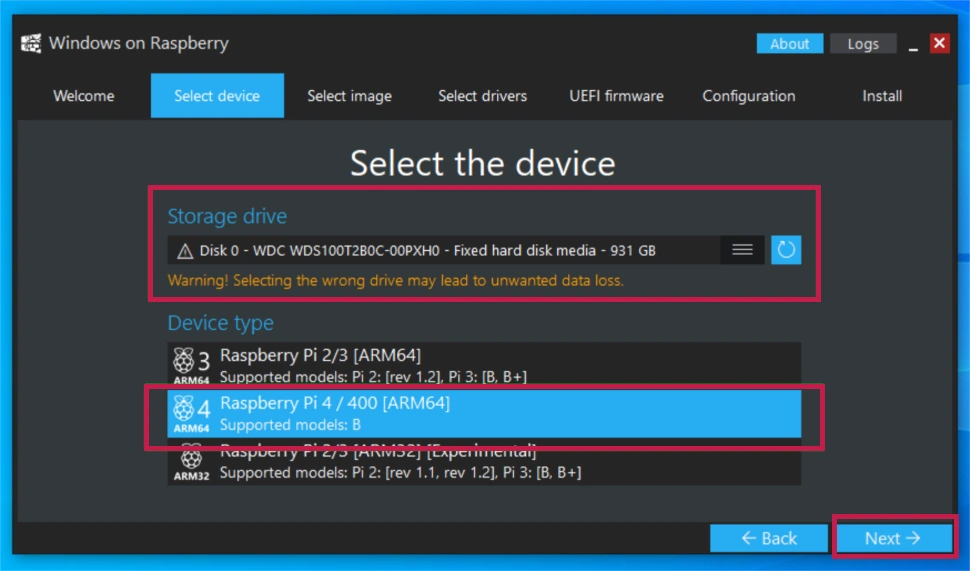
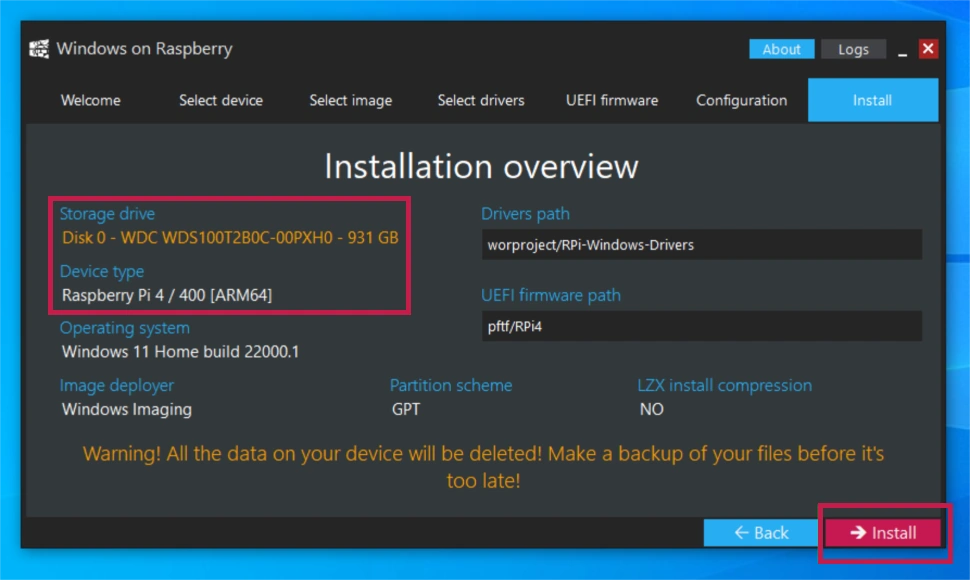
- Now, choose the microSD card that you want to install Windows 11 on. Select the device type from the drop-down. Here choose Raspberry Pi 4 / 400 [ARM64] and click Next.
- In the next window, navigate through the file explorer and choose the newly created Windows 11 ISO file and click Next.
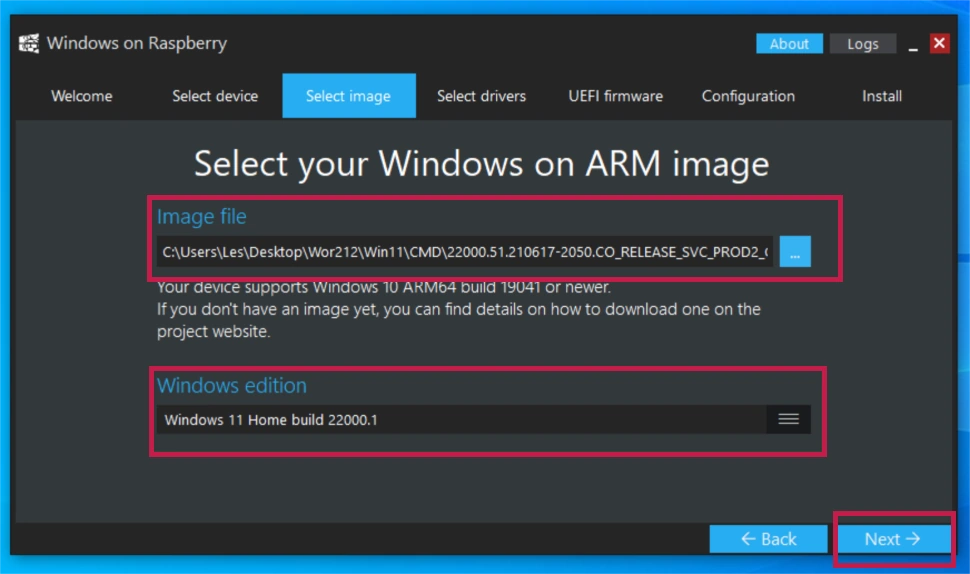
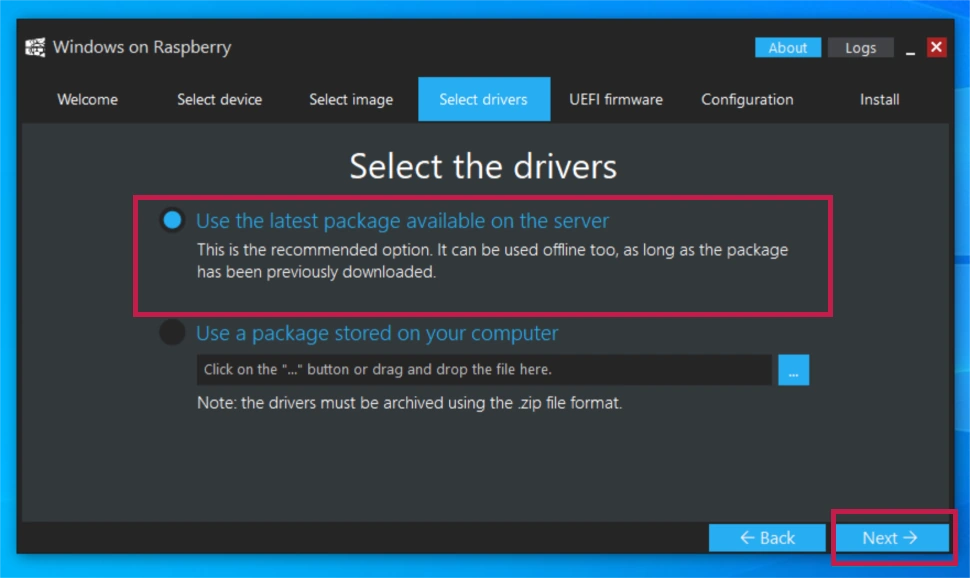
- When prompted to select the driver, select the first option to use the latest package of drivers available on the server.
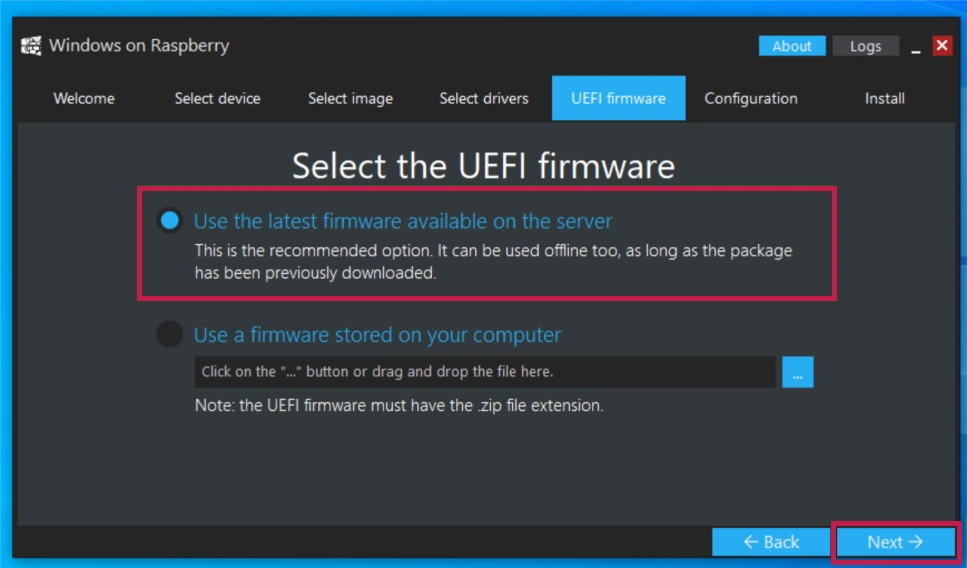
- In the next screen, choose the latest UEFI firmware from the server, and hit Next.
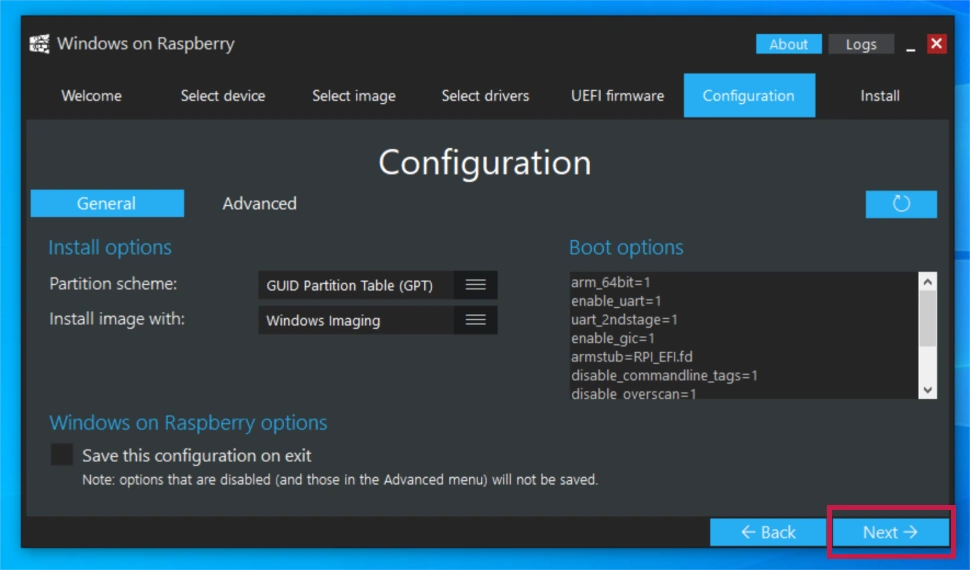
- Now, verify the configuration and click Next.
- Check the installation overview if everything is ok, then click Install. Since you are using a microSD card, the installation will take some time.
- Once the installation is complete, close the tool window and eject the card from your computer.
- Insert the microSD card into your Raspberry Pi, plug your peripherals and boot up.
Windows 11 should be installed on your device now, and let’s see how to set it up.
How to Set Up Windows 11 on Raspberry Pi 4
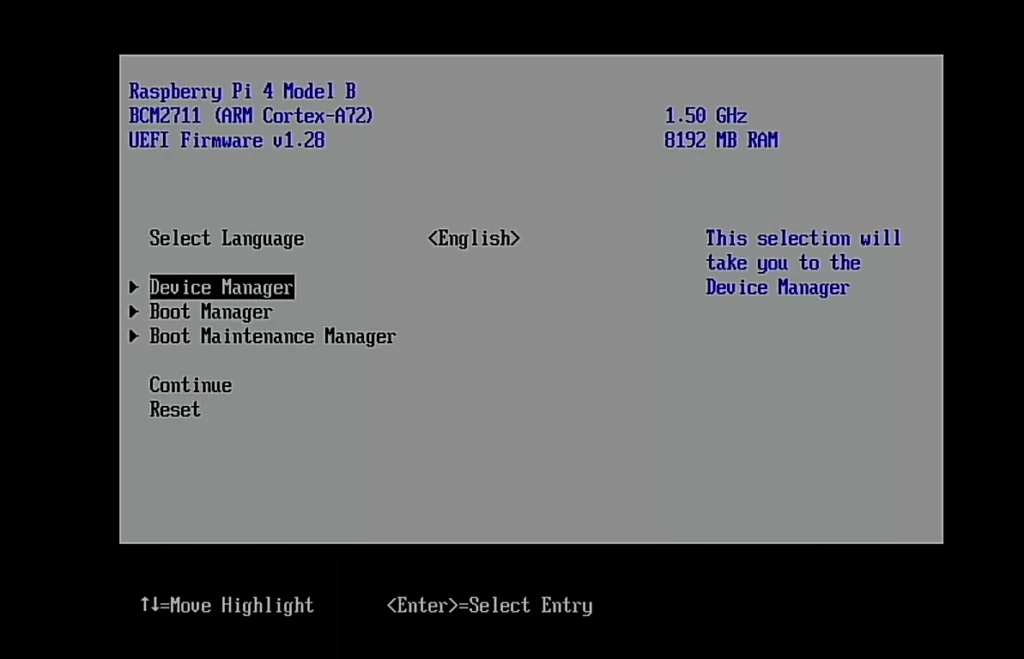
- Boot your Pi and press the Esc key if asked. It will take you to the setup mode.

- Now come down to Device Manager and hit enter.
- Again, come down through the list and choose Raspberry Pi Configuration.

- Select Advanced Configuration and then set Limit RAM to 3 GB to <Disabled>. Then press F10 to save the changes and Esc to exit.
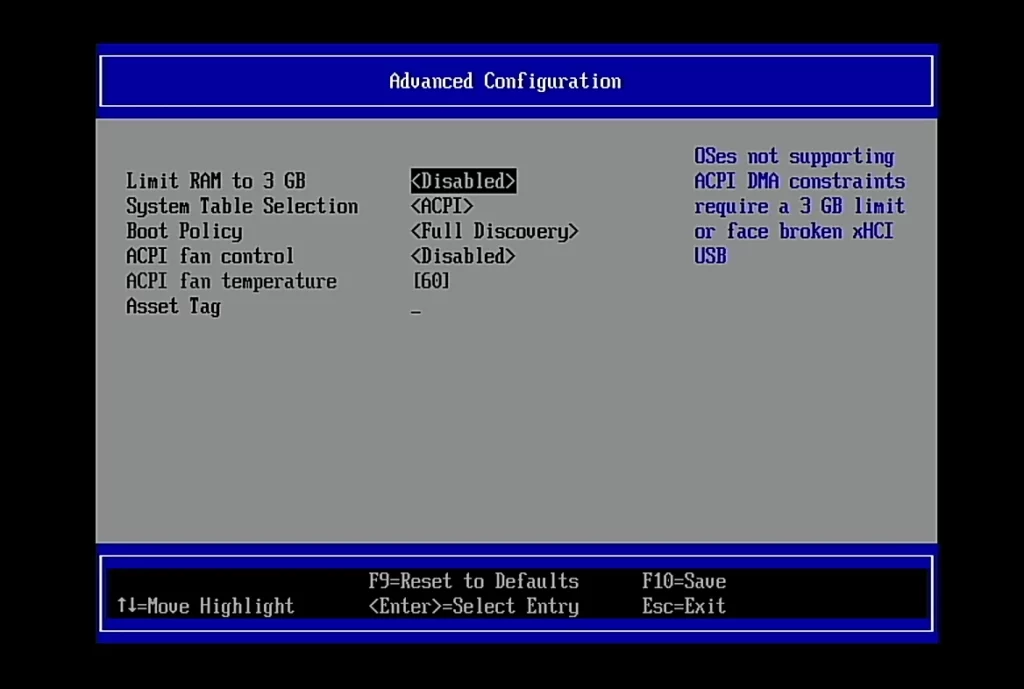
- Under Raspberry Pi Configuration, go to Display Configuration, set your preferred resolution, and press F10 to save and Esc to exit.

- Now, press Esc until you come back to the initial setup menu and then select Continue.
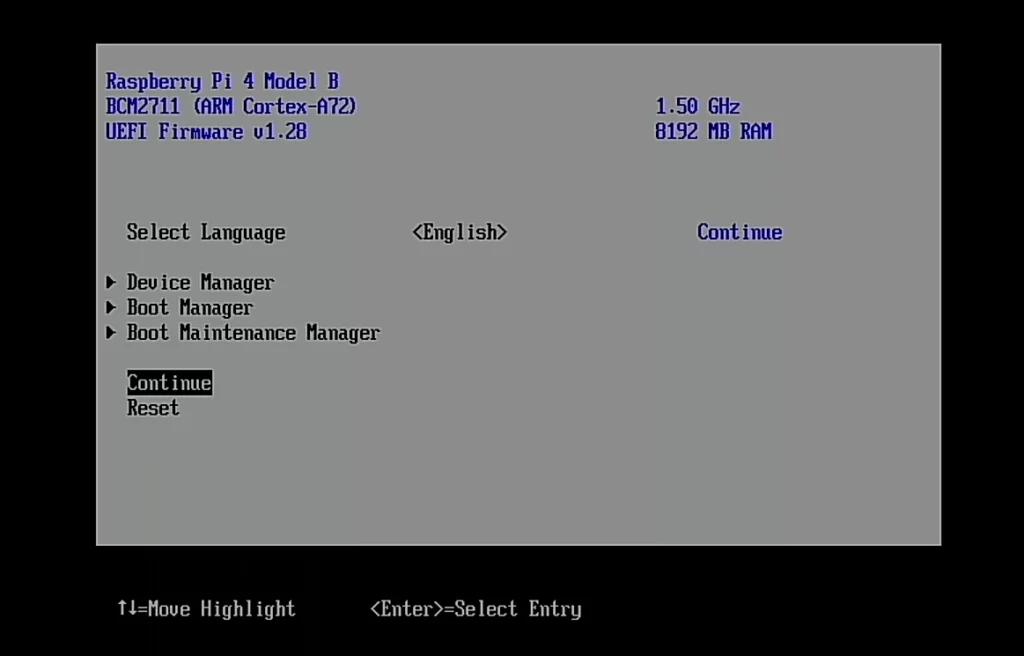
Your device will now exit the setup/bios mode and boot with the new settings on Windows 11!
Now that you’ve successfully installed Windows 11 on Raspberry Pi 4 and set it up correctly for a smoother experience. You can now start exploring the new features and apps of the brand new Windows 11 on your cute little Pi.


Hallo,
I want to install windows 10 for the RPI.
i choose te right install file.
It takes 4 hours to do this !!!!
When it was done it installs win 11 and not win 10
I started again with use an ssd drive for de rpi400
That go’s much more faster.
Why is the wireless adapter gone and only the utp works on my rpi400
Also in the bios from the pi400 the wireless adapter is gone !!
Vishnu Mohan
Hello, can you add that 16 GB microSD is not enough. I did it with a 16 GB microSD card, following your instructions, and it was 99% full.
Hi Gordon,
Thanks for your comment. The public build has more size and you may require a 32 GB card.
I’ve mentioned the same in the requirements section.
Regards.
Don’t waste your time if you need WiFi. There is currently no available driver for ARM64, neither the integrated chipset nor USB adapter.
I am trying flash 128gb SD Card ARM64 Windows11 for Raspberry, but getting error unable to read partition as fat on Raspberry pi. What should I do. Please help.
I have downloaded ISO using Mac OS and using sudo dd if=/Users/vivekrastogi/Downloads/25169/25169.1000_CORE_ARM64_EN-US.ISO of=/dev/disk3 bs=1m