The Raspberry Pi, being the most used single-board computer, has got (and still developing) an endless number of use cases today in various domains. The applications can start from a simple Wi-Fi router to a desktop PC to complex machine learning projects.
In case your Raspberry Pi comes without an SD card preloaded with the NOOBS operating system, then you need to manually install an OS on your SD card. You can actually install a large number of operating systems on your Pi including Windows 10, FreeBSD, and some Linux distributions like Raspbian, Arch Linux, etc.
In today’s tutorial, I will show you how exactly you can install ubuntu on Raspberry Pi. I’ll be providing commands, instructions, and screenshots so that the installation process will be much easier and can be followed by beginners too.
Please note that this tutorial is about installing the Ubuntu desktop on Raspberry Pi and NOT the Ubuntu server.
So without much ado, let’s get started.
Contents
Requirements
- Raspberry Pi 4/3/2
- Power Supply
- MicroSD Card (8GB minimum, 16GB recommended)
- Type-C power cable
- Monitor with an HDMI interface
- Micro HDMI cable
- USB Keyboard
- USB Mouse
Steps to Install Ubuntu on Raspberry Pi
Step 1: Flash the Image to SD Card
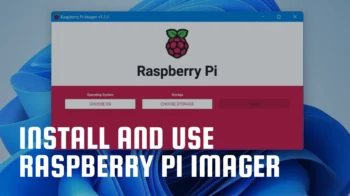
The first step in the installation process is flashing the Ubuntu image file to your SD card. For this purpose, there are quite a few decent programs available free of cost. In this tutorial, we’ll be using the Raspberry Pi Imager.
Warning!
Flashing an image to an SD card is a destructive process and it will erase all the existing data. I highly recommend creating a full backup of all the data on your SD card.
- First, insert the microSD card into your computer.
- You need to install a suitable Raspberry Pi Imager for your operating system. You can do this on an Ubuntu computer by issuing the following command in the terminal.
sudo snap install rpi-imagerFor Windows download the exe file from here: imager_latest.exe
For Mac download the dmg file from here: imager_latest.dmg
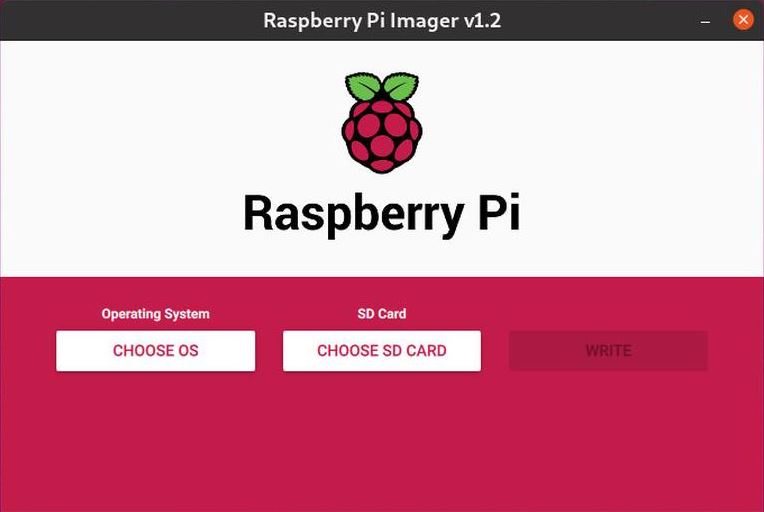
- Once done with the installation on your computer, launch the imager application and you will see an interface like this (Here I’m using Ubuntu OS on my computer).
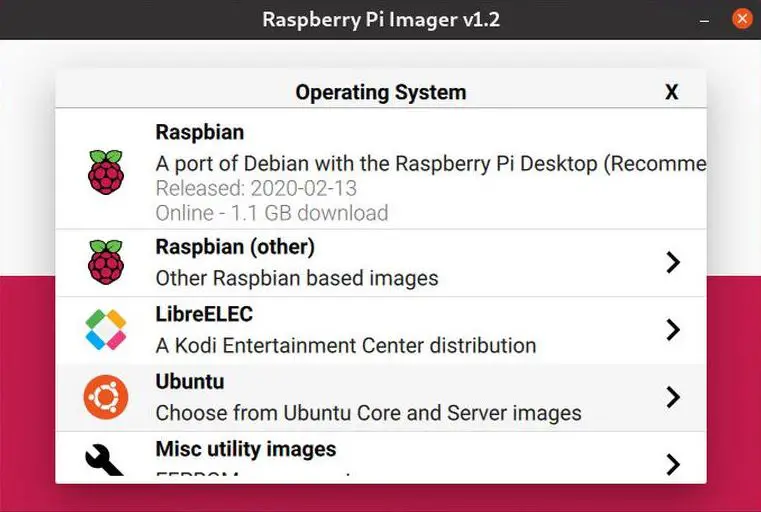
- Click on CHOOSE OS button. This will open the menu for selecting the operating system that you need to install on your Pi. Scroll down and choose Ubuntu.
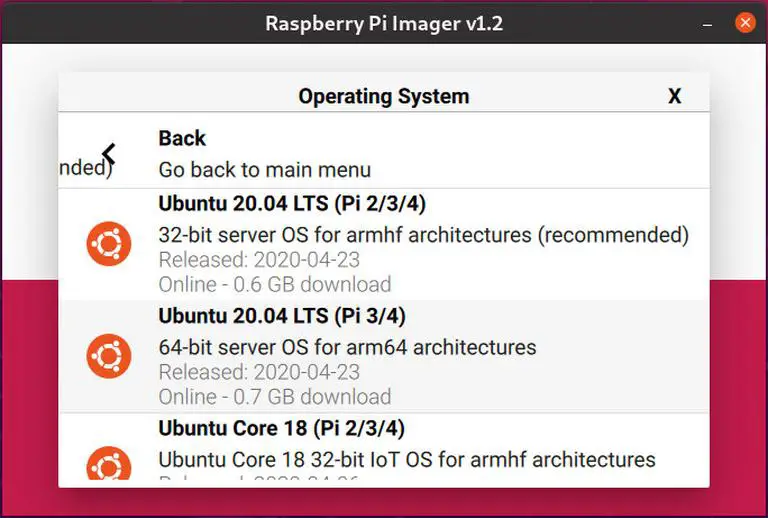
- You will now see a list of Ubuntu images available for flashing. Choose the image suitable for your Raspberry Pi model. The supported models are shown inside parentheses like (Pi 3/4). As I’m using a Raspberry Pi 4, here I’m selecting the Ubuntu 20.04 LTS (Pi 3/4) 64 bit for flashing.
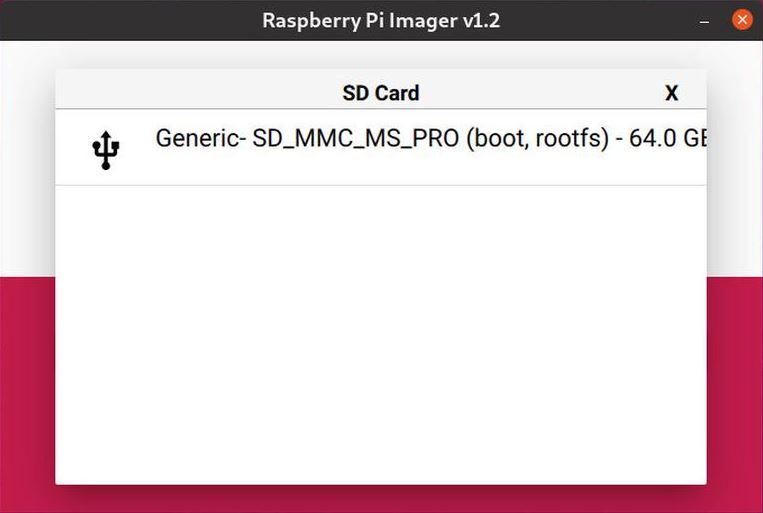
- Now click on CHOOSE SD CARD option, and select your SD card from the new menu that appears. If you have multiple sd cards inserted, make sure that you have selected the right card before flashing.
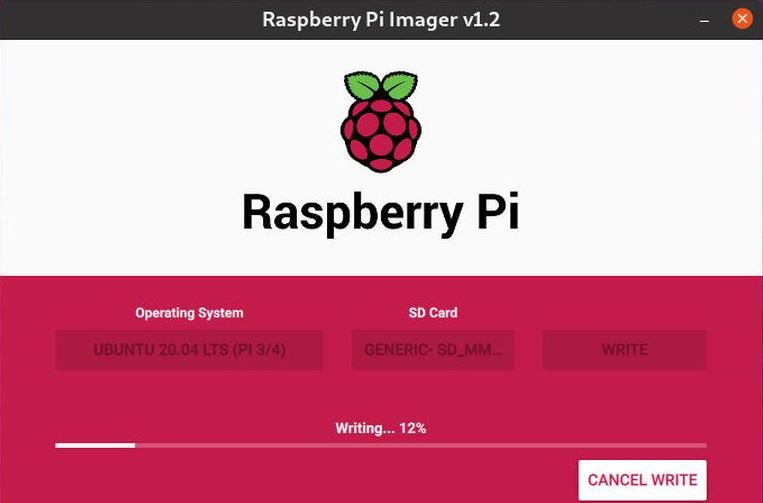
- Then click the WRITE button to download the selected image and start the flashing process. This may take some time, depending on the file size and write speed of your card. (If you need a higher read and write speed then you can consider getting a class A2 SD card. It can provide write speed up to 170 MBPS)
- Once the flashing process is completed, you will see a window with a success message like this.
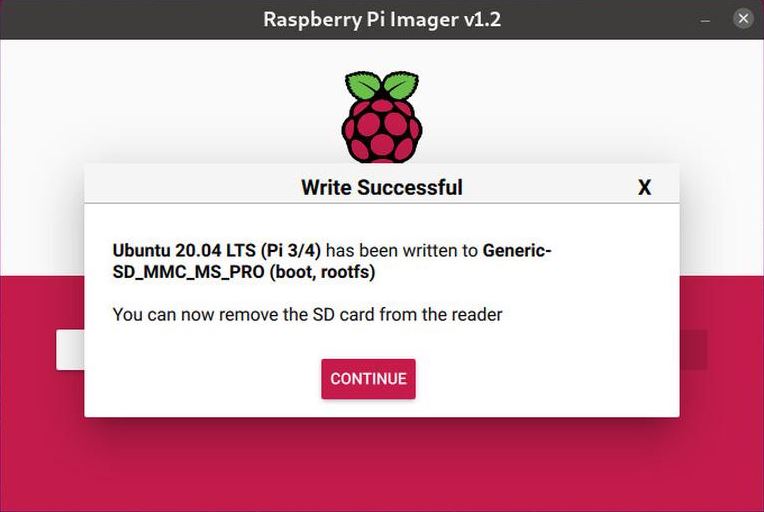
- Click on Continue and you can now safely eject your microSD card from your computer.
Step 2: Configure the Network (Optional)
This step is completely optional depending on the type of network you are using. If you are gonna use a wired connection, this entire step 2 is optional. Just connect your Pi to your home router and proceed with step 3.
In case you have a wireless connection like Wi-Fi and gonna use that, you have to follow the below steps to configure the networks option on your Pi.
In order to connect your Pi wirelessly at the time of booting, you need to make some tweaks to the network configuration file that is network-config.
- If you removed the SD card from the computer slot, insert it again and it will mount automatically.
- Now you need to go to the system-boot partition on your SD card with the file manager on your computer.
- Open the network-config file and update it with your Wi-Fi credentials. For better understanding and easy execution, I will show you an example. If the name of your Wi-Fi network is “raspberry-expert” and the password is “Rpi3418” you need to edit the file as below:
version: 2
ethernets:
eth0:
  dhcp4: true
  optional: true
wifis:
  wlan0:
  dhcp4: true
  optional: true
  access-points:
    raspberry-expert:
password: "Rpi3418"- Once editing is done, save the file and eject the card from your computer. Once your Pi boots up, it will automatically connect to the specified network.
Step 3: Boot your Desktop
There are 2 ways by which you can boot your Raspberry Pi. You can boot either in headless mode and connect via SSH or you can plug your HDMI screen and USB keyboard for normal booting. You have to first decide which method you are gonna use. Whichever method you choose to boot, follow the instructions given under the respective headings.
Headless Booting
If you wish to proceed with headless mode, just follow the below steps:
- It will take some time to boot, as it is the first time boot.
- Once your device is ready after booting, find out the IP address of your Raspberry Pi and log in via SSH. To find out the IP address you can refer to my article here. Also, both the default username and password will be ubuntu. To ssh into Ubuntu use the following command.
ssh [email protected]For the first time you log in, you will be prompted to change the ubuntu user password. So proceed with that and you will be done.
Normal Booting
Just in case, if you are not going with the headless mode, it is IMPORTANT to ensure that the peripherals like HDMI display and USB keyboard are plugged into the respective ports before powering on your Raspberry Pi.
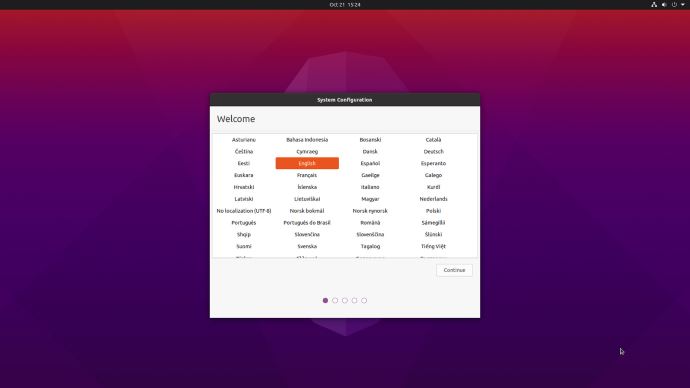
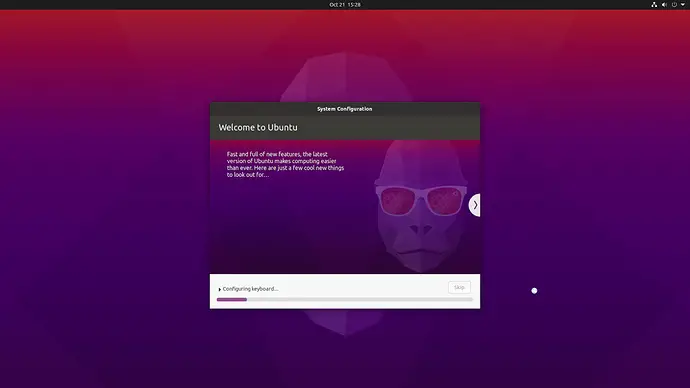
Once you boot up the Pi with the display connected, you will be able to see the boot process on screen and, eventually, the setup wizard.
- First, select your preferred language.
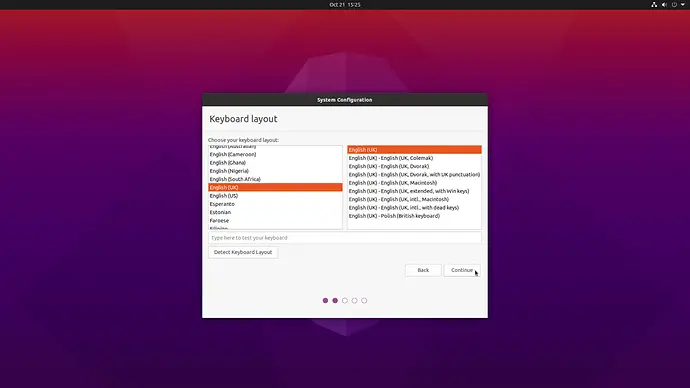
- Then choose the keyboard layout.
- Now pick a time zone for you. This will be used to give the correct time.

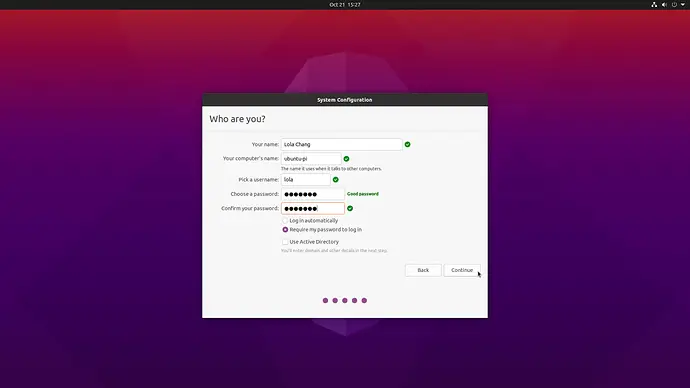
- Once done with that, you will be asked to set up a user and set a password.
- On successful setup, you will be taken to the welcome screen of Ubuntu Desktop.
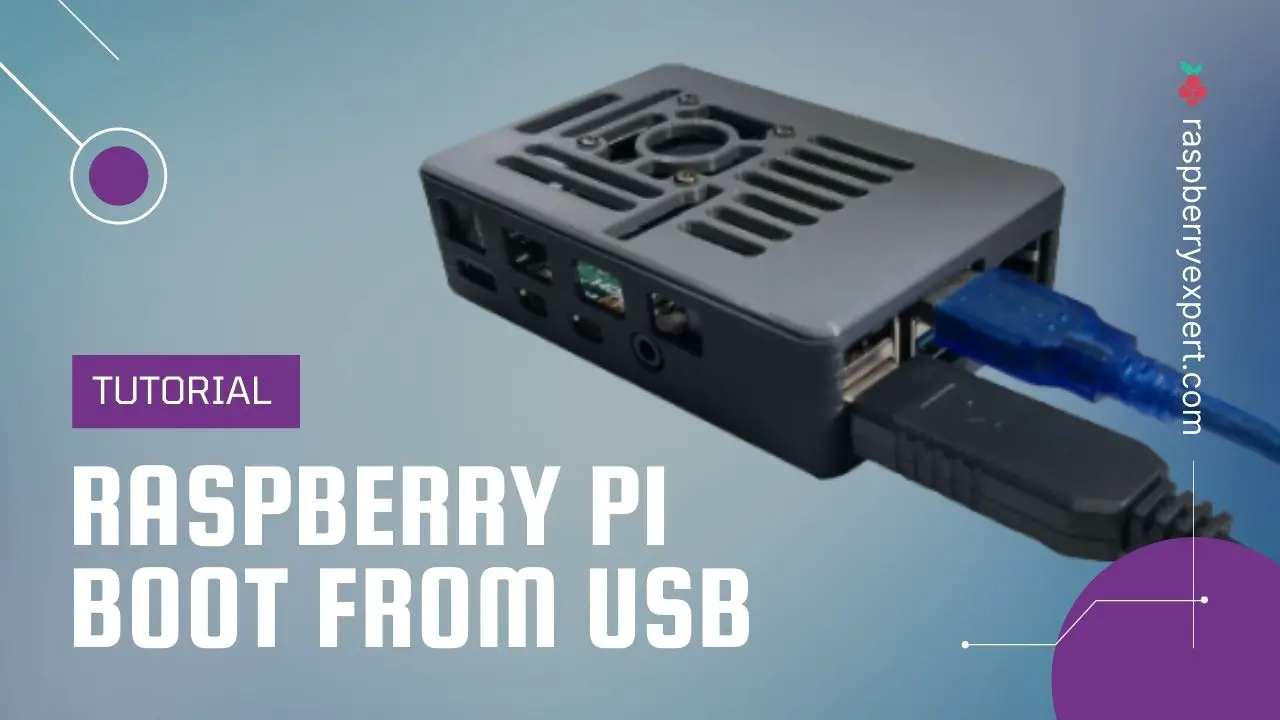
Step 4: Boot from USB (Optional)
You can also boot your Raspberry Pi from a USB-connected hard drive or an SSD with no microSD card involved. But if you have Raspberry Pi 4, you can only do this after booting from an SD card first. This is because all Raspberry Pi 4 models ship with an EEPROM configuration that boots from an SD card only.
And, this step is completely optional and you can also stop with step 3. If you wanna go a bit further to boot your Pi directly from a hard drive or SSD, you can follow the below instructions.
- First things first – you need to update the EEPROM of your Pi using the below command.
sudo apt install rpi-eeprom- Now, extract the current bootloader file to a text file. Do this by this command.
sudo vcgencmd bootloader_config > bootconf.txt- Next, we need to modify the BOOT_ORDER option to 0xf41. This means nothing but, the order of booting is changing to SD card > USB mass storage and then repeat. If you are interested you can refer to the Raspberry Pi 4 bootloader configuration here. This can be done by using a technique called sed hacking. In simple words, just issue the following sed command.
sed -i -e '/^BOOT_ORDER=/ s/=.*$/=0xf41/' bootconf.txt- Alternatively, you can change the boot order by using vim bootconf.txt and make the changes yourselves.
- Now we need to create a copy of the EEPROM with the updated configuration:
rpi-eeprom-config --out pieeprom-new.bin --config bootconf.txt /lib/firmware/raspberrypi/bootloader/critical/pieeprom-2020-09-03.bin- Now set the system to flash the new EEPROM firmware on the next boot. To do so, use the following command:
sudo rpi-eeprom-update -d -f ./pieeprom-new.bin- Now give the following command to apply the changes.
sudo rebootAnd finally, you have to flash the image onto a hard drive or SSD. That’s indeed an easy task. Just scroll all the way up and refer to STEP 1 and go through it replacing the SD card with your hard drive or SSD.
Once done, you will be able to boot from your hard drive/ SSD.
Congrats!
Final Words
Though you’ve gone through a lot of steps in this tutorial, the steps to install Ubuntu on Raspberry Pi are pretty straightforward. Only follow the steps required in your case. I’ve clearly mentioned the options steps which are intended for special conditions and for those who like to go a bit further.
If you mess up with any problems or have feedback, just drop a comment below.
Found an issue with this article? Report it here, so that I can resolve it.