In today’s article, I will show you how to make your Raspberry Pi boot from USB without an SD card. By default, the Raspberry Pi boots only from SD cards that contain an operating system installed on it. But we have a workaround for this. We can ditch the microSD card after the first boot and activate the USB boot mode in the One Time Programmable (OTP) memory.
Not only the USB stick, but also you can follow this guide to make your Raspberry Pi boot from SSD or a flash drive as well.
Before you proceed, let’s check the benefits of booting Raspberry Pi from USB or SSD.
Contents
Benefits of Booting from USB SSD or Flash Drive
While the microSD card is adequate for most of the simple use cases like small DIY projects and simple IoT projects, it’s not optimal for bigger projects like a full-fledged PC. It’s obvious that the read-write speeds of SSDs are much higher than the standard sd cards. And when it comes to applications that require frequent writing to the file system, the sd card miserably pegs away.
Though the SDcard and SSDs are NAND flash memories, they differ a lot in other terms. The contents on an sd card can only be overwritten a finite number of times, and after that, it starts to wear off the storage. But in the case of SSDs, it uses sophisticated technology to withstand the wear of storage due to frequent writes to the file system.
There are several reasons why you might want to boot raspberry pi from USB. One of the main reasons is its lower cost compared to sd cards. Another benefit is that you can easily swap out your storage devices often. Moreover, using USB storage will benefit you while you run a retro gaming emulator or a NAS or such projects that require more storage.
Requirements
Following is the equipment you will need to boot Raspberry Pi from USB.
Recommended
Optional
Raspberry Pi Boot from USB
- To get started, you need to start off from an sd card with Raspberry Pi OS installed. This is needed for the first time only to configure the USB booting. So boot your Pi with the sd card first.
- Upon landing on the desktop, open the terminal and run the following command to perform an update of the OS and firmware.
sudo apt update sudo apt full-upgrade sudo rpi-update - Once updated, reboot your Pi with the below command.
sudo reboot - Now, install the latest version of the bootloader by typing
sudo rpi-eeprom-update -d -a - Reboot the Pi again using the
sudo rebootcommand. - Then launch the raspi-config tool by typing
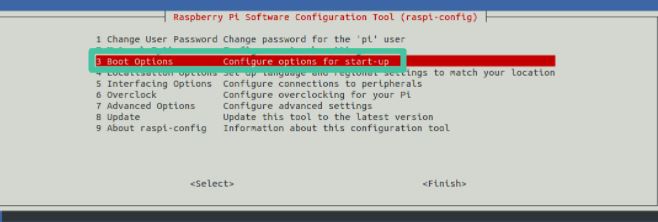
sudo raspi-config - In the window, select Boot Options (item no. 3) and press Enter.
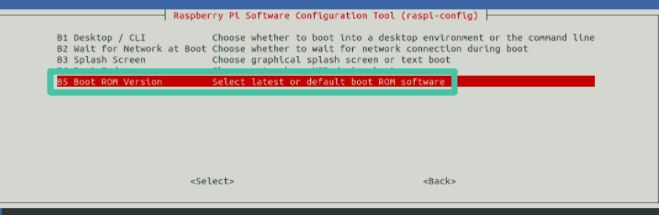
- In the next window, choose Boot ROM version and press Enter.
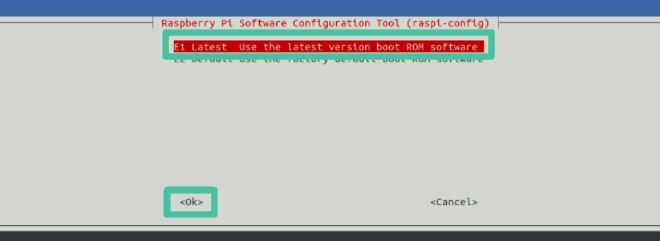
- Select Latest and then Ok.
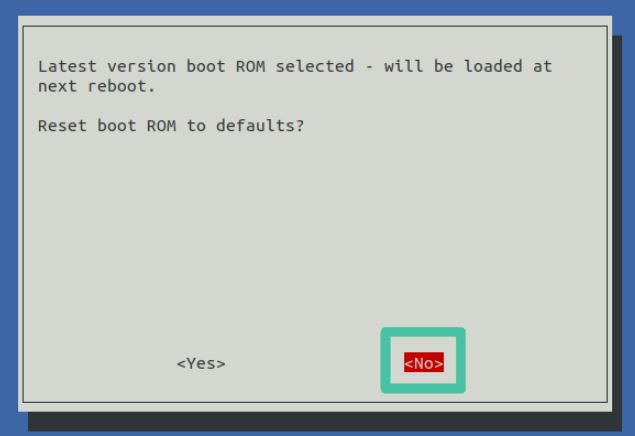
- Now you will be shown with this window and asked to reset the boot ROM to defaults. Here select No. Then press Ok to close the next dialog box.
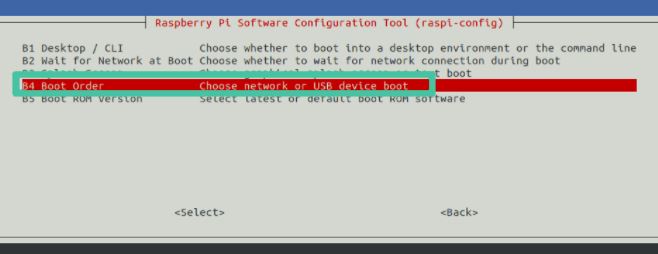
- Select Boot Order and press Enter.
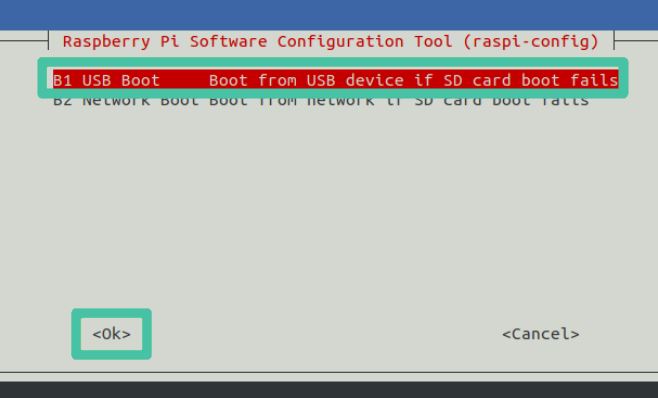
- In the next window, select USB Boot. Note that if you put an sd card with OS installed, it will boot first. So once this process, don’t insert both sd card and USB at a time. Then press Ok.
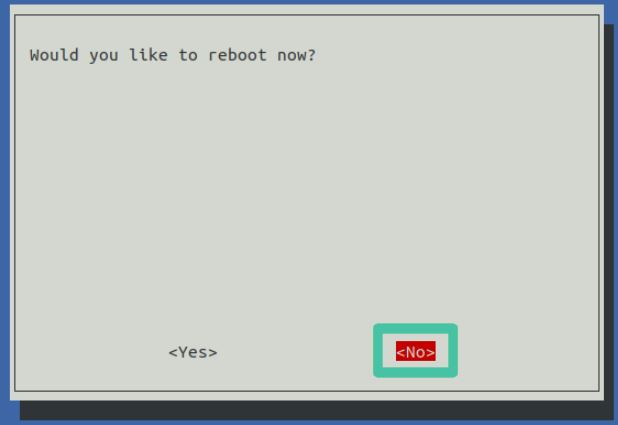
- Now select Finish. When asked to reboot select No.
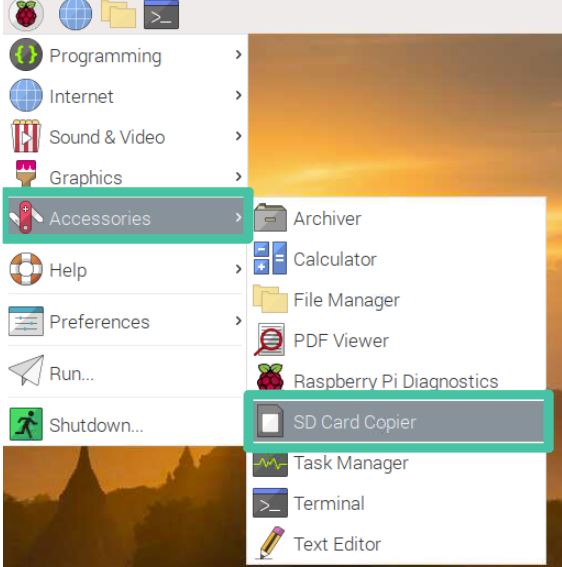
- On the desktop, click on the Raspberry Pi icon and then go to Accessories > SD Card Copier. Make sure that you have already connected the USB drive or SSD into the USB 3 port of your Pi.
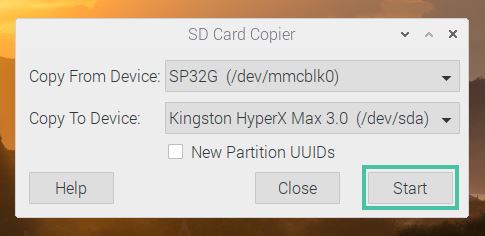
- Select Copy From Device (microSD card) and then the Copy To Device (USB or SSD). Now click Start to copy the files. This may take around 10 minutes to complete.
- Once done with that, shut down the Raspberry Pi.
- Remove the microSD card. (USB/ SSD should be plugged in the port)
- Now, Power on your Pi, and it will boot from the USB or SSD.
Please note that if you are using an external drive that draws a lot of power from the bus, you may encounter some issues. Probably you can solve this by using a self-powered external drive or a powered USB hub.
Also, if you face any issue with booting your Raspberry Pi you can read my troubleshooting guide.
You may also like: Raspberry Pi Dual boot guide
Found an issue with this article? Report it here, so that I can resolve it.


Hi, thank you for you fantastic guide. I have a RPi 3B, and at the command sudo rpi-eeprom-update -d -a it says “This tool only works with a Raspberry Pi 4”.
How can I solve this issue?
Same, please help.
Same here! Please help.
It’s not essential. Most Pi3B’s have a good enough firmware to boot external USB stock right out of the box. This step is for the latest greatest.
Thanks for the detailed instructions. I would like to have Ubuntu 20.04 on the SSD for my RPI4. How would I go about to do that? rpi-eeprom-update is not available on apt on Ubuntu on RPI, or is there a specific repository I need to add?
Nice explanation.
Is there a way to boot from the SD (only the /boot folder) having the system on a USB drive?
Same here as Gianluca, Coder Extreme and Mike Davis !
Please fix recommended requirements while waiting to find the right method for rpi 3B.
What are consequences of done part of tutorial?