Creating a full backup of Raspberry Pi OS (formerly Raspbian) is always a need for enthusiasts like us and it’s also a great skill to know. If you are crazy about involving in the development of innovative raspberry pi projects, you are likely to do tons of experiments on your own. And, the chances are high that you may end up with some mishaps with your Pi and its SD card. If anything goes wrong with your experiments, you will lose all your data for sure.
Or in case if you are a beginner just starting out with python and raspberry pi accessories, then you are also likely to end up with the same situation. This is the context where a full OS backup will come to the rescue. If you already have such a backup before experimenting and running into any issues, it will definitely help your out. All you need is to restore it on your SD card.
But how do I do this? Well. Relax, I’ve got you covered. In this tutorial, I’ll show you 3 methods to back up raspberry pi to an external drive and restore it whenever needed.
So let’s move on.
Contents
Equipment Required
- Raspberry Pi
- Power Supply
- Micro SD Card
- SD Card Reader (Adapter)
Method 1: Copy the SD Card Image
This is the simplest method to backup Raspberry Pi SD card. This method involves copying the entire SD card as a single image file.
This is exactly the opposite of flashing an OS on your SD Card. It actually unpacks all the OS files and configures them to work on the Pi. But here, we are packing all the data on the SD card to a single image file that can be restored whenever necessary. This is how exactly OS image files are created in the first place.
Follow the steps to create a full backup image of your SD card:
- Power off your Pi and remove the SD card. Put it in a card reader or an adapter and plug it into your computer.
- Now, if you are using a Mac or Linux computer open a Terminal window and type df. Look at the drives that show up. If your SD card is not showing up, unplug and replug the card. Once, it is detected enter df again.
- Now you will see a newly mounted drive. For example, on a Mac system, the name will be something like /dev/rdisk2, and on a Linux machine, it will show /dev/sda (the names may vary so be sure to check carefully).
- On Linux use the following command:
sudo dd bs=4M if=/dev/sda of=raspbian.img- On Mac, type the below command:
sudo dd bs=4m if=/dev/rdisk2 of=raspbian.img- This will create a complete image file of your SD card (Raspbian os) and you can use this raspbian.img file to restore your entire operating system in its current state to an SD card. This can be achieved by using the dd command in reverse, or by using an application like Etcher to flash the SD card.
- On a Windows machine, you can backup the SD card by using the Win32 Disk Imager which can be used as a raspberry pi backup software.
- Just download, install, and open the program.
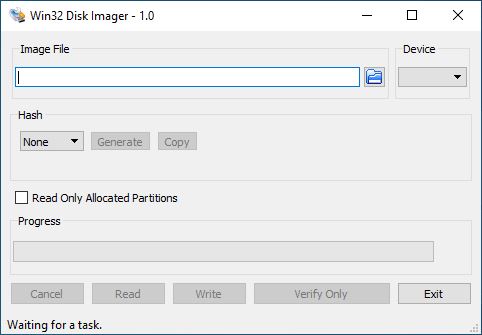
- Click Yes to the security alert dialog box.
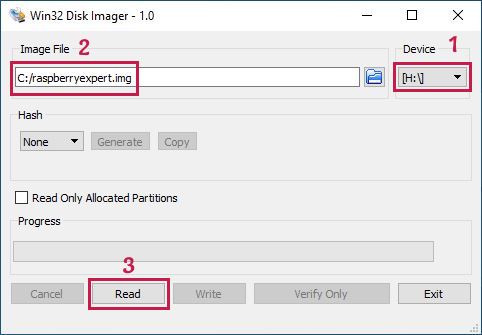
- Choose the device at the top right corner and enter C:/raspberryexpert.img (you can use any name as you wish) in the Image File text box and click Read.
- It will start creating the image file and you can see the progress like this.
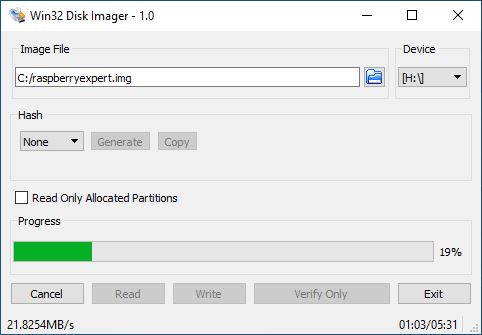
- Once completed, the entire SD card will be written into an image file. When it says “Read Succesful”, click OK
Method 2: Zip the Home Directory
The main drawback of the first method is that you need to create regular backups. This involves removing the SD card from your Pi, inserting it into your computer, take the back, and reinserting it into the Pi. This is kind of a boring thing. This method comes with a fix for the issue. It lets you backup raspberry pi without removing sd card.
In this method, we will take the backup of only the home folder as a compressed file. Uncompressing this file lets you browse and restore every file and directory.
For this use the terminal and issue the following commands.
cd /home/
sudo tar czf pi_home.tar.gz pi
This will create a file named pi_home.tar.gz and you can copy this file to a USB drive or other devices for safekeeping.
Moreover, if you want to backup raspberry pi while running, the is one of the best methods that you can follow.
Method 3: Scheduled Backups
This is a great method to backup raspberry pi automatically using cron jobs. You can schedule the backup manually by scheduling the tar command as a cron job. But there is an easier approach for this by using a free program named Déjà Dup. This automates the commands and gives the user a graphical interface.
With this program, you can backup Raspberry Pi over networks remotely to cloud storage using Google Drive, Amazon S3, FTP, SSH, or by copying the files directly to a flash drive.
You can even choose folders to include and exclude and it is easy to restore too. The Déjà Dup is installed on Ubuntu by default, and it’s easy to install on Raspberry Pi OS. Type the below command to do so.
sudo apt-get update && sudo apt-get upgrade
sudo apt-get install deja-dup
Once the commands are issued, you will find a program called Backups in Menu > Accessories. Open it.
- Here, click on folders to save and ensure that the Home (Pi) is checked. The directories to ignore should include rubbish bin.
- Then click on storage location and change it from Amazon S3 to your flash drive.
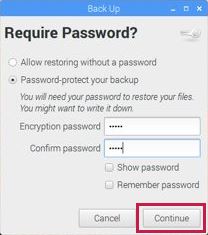
- Go back to the overview and click on Back Up Now. This will begin the creation of the first backup of your home folder. You will be asked for an encryption password if you want to make the backup secure. Enter the password in both the fields and click Continue.
- Once the first backup is completed, you can set up a schedule for the next backup. Set the OFF button to ON.
- Click Scheduling and change Week to Day (or as per your wish).
This will now create a backup of your selected folder on a daily basis and store it on your flash drive. And these files will be ready to restore whenever you want.
Restore the Backups on Raspberry Pi
In case you lose your data due to a total system failure or complete data wipeout, you will need to restore the backups that you created earlier. To do so follow the below steps.
- Plug the flash drive (where backups are stored) into your Pi. Now open Accessories > Backups.
- Click Restore to reinstall any missing files and folders. A Restore from where windows will appear if you are installing from a fresh Raspbian image. Now choose your flash drive and click Forward.
- You need to select the date to pick the corresponding backup file and click Forward.
- Here you have two options. Restore everything to its original locations and to a folder that you specify. Choose to restore to the original location and click Forward and Restore.
- If you had encrypted the backup file with a password, enter the same password when promted. Then click Continue.
- This will restore all the files and folders to your Pi and it will show a “Restore Finished” message once it’s done successfully. Close the window and you are done!
Conclusion
So, I hope that you’ve learned 3 methods to backup raspberry pi images and restore them easily. I’ve tried my level best to explain things as simple as possible. However, if you hit with any problems just drop a comment below.
Found an issue with this article? Report it here, so that I can resolve it.


Hello. Instead of the image file (method1)
i get dd: /path: Resource busy
do you know why?
I forgot to mention that i just plug it in, and follow the instructions
Cheers
Couldn’t we do all backup on the RasPi and without another computer?
Just attach and mount am USB-harddisk on the RasPi and do the backup there with dd from the running SD to the harddisk (as an image)? And restore it on the same RaspPi with dd from the harddisk image to a new SD card (via USB Adapter)?
I tried this but got into trouble when restoring: It seems the restored image can not be used in another RasPi. Any ideas or suggestions?
I’m running Debian cinnamon on a M.2 SSD hat using M.2 as native drive with no SD card but now I want to save or backup onto the onboard SD card slot.
Is there something like Timeshift on 86x linux but for the PI?
I tried this but getting an error
BackendException: PyDrive backend requires PyDrive and Google API client installation.
Please read the manpage for setup details.
Exception: No module named ‘httplib2’
Really interesting post!
My raspberry is used as a VPN and gets corrupted aproximatly every two weeks jaja. I’m gonna try this. Thanks for the post!!
Win32 Disk Imager looks horrible, has horrible reviews, bricks SD cards left and right. Any other imager you recommend?