In this tutorial, I will show you how to enable the Raspberry Pi remote desktop facility to make things easier for you. This will be useful if you don’t have a screen with your Raspberry pi and want to make regular changes to it. In case you are working on something serious, making regular changes without a screen is a real headache. So, having remote desktop access on your Pi is gonna be a real lifesaver!
Here I will walk you through 5 different methods by which you can get your Pi connected to a remote desktop from another computer (Windows/ Mac/ Linux). So here goes the list of 5 ways you can use to run a remote desktop on your Raspberry Pi.
- Xrdp Server
- SSH & X11 Forwarding
- Team Viewer
- VNC
- NoMachine
Before you get started, you have to find your Raspberry Pi IP address and SSH into it. You can read my articles to know how to do these.
Contents
#1. Raspberry Pi Remote Desktop with Xrdp Server
For your knowledge – Xrdp is a free open-source remote desktop protocol server from Microsoft that enables operating systems other than Windows to provide a fully functional remote desktop experience.
Prerequisites
I assume that you have Raspbian installed on your Raspberry Pi.
The Raspbian OS comes with different versions out of which Raspbian Lite comes without a GUI. If you have installed the Lite version, then you need to install a desktop environment that will act as a backend for the Xrdp server software. If you have other versions of Raspbian on your device, Skip this section.
There are a plethora of desktop environments available in Raspbian repositories. Here I’ll be using the Pixel as it is the default environment on Raspbian desktop images. Also, it’s very stable, lightweight, and fast which makes it perfect for use on a remote server.
Firstly, log in to your Pi and run the following commands to install the pixel DE.
sudo apt update
sudo apt-get install raspberrypi-ui-mods xinit xserver-xorg
When you issue the commands, the downloading and installation will begin. It will take some time to complete the process depending on your system.
Once done with that, reboot your system by running this command. Rebooting is just to reflect the changes.
sudo rebootInstallation
1. Before we install the packages required, we have to verify everything is up to date. To do so, we have run the following 2 commands.
sudo apt-get update
sudo apt-get upgrade
2. Now we need to install the Xrdp package on your Pi. So do it by issuing the below-given command. Once done, the Xrdp software replicates Microsoft’s RDP protocol so that other desktop clients can also remotely connect to your Raspberry Pi.
sudo apt-get install xrdpNow the Xrdp server package will be installed on your Pi with the best possible configuration and will be ready to work.
Connecting from Windows
From Windows computer, open the start menu and select the Remote Desktop Connection application and type the IP address.
Now click on the Connect button and you will be taken to the Xrdp login screen.

Enter the username and password for the account already existing on your Pi. If you are using the default pi, then your username will be pi and the password will be raspberry. Once entered, click the OK button, and you are set.
At this point, you will be able to access your Raspberry Pi using the remote control desktop tool on Windows computer.
If you installed the Pixel DE then you will see the default Pixel desktop. It’ll look like this.
![]()
If you are interested you can read my article on installing Windows 10 on Raspberry Pi.
Connecting from Linux
For connecting with a Linux PC, I recommend using Remmina which is a remote control client for POSIX-based OSes. For installing it run the following command.
sudo apt-get install remminaOnce installation is complete, launch Remmina by issuing the following code.
remminaYou can also launch from the internet menu like this.
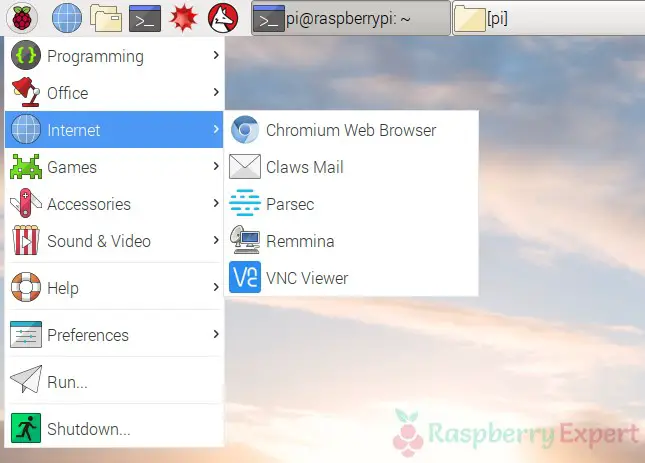
Now, in the new window fill the IP address and connect it. Make sure that the RDP protocol is selected as in the screenshot below.
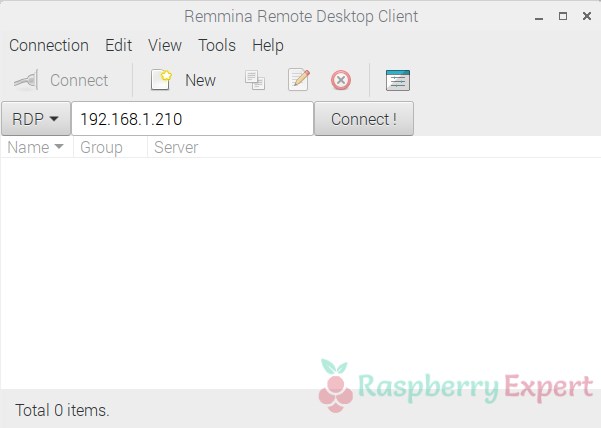
In case you encounter the color depth issue, just select the GFX RFX (32bpp) from the list.
Connecting from Mac
For Mac, there are several RDP clients available that you can use to enable a remote desktop connection on your Pi.
For example, you can download Microsoft Remote Desktop from the app store and connect it by filling in the IP address.
#2. Remote Desktop with SSH and X11 Forwarding
The X11 is the main Linux Graphical Window Manager. Here we use the technique of X11 forwarding for accessing your Raspberry Pi on a remote desktop.
X11 forwarding over SSH is a great way to launch an application from a server when it is connected via SSH.
This method also works from a remote location because it is more than enough to open the SSH port (22) from outside.
One thing you have to do is to limit the allowed IP addresses to avoid any security issues. You can also add an additional layer of protection by enabling stuff like fail2ban to prevent unauthorized access from outside.
Installation
In Raspbian, the X11 forwarding is enabled by default. So you don’t have to do anything special.
In case, it’s not working set the X11 forwarding to yes in /etc/ssh/sshd_config
This will enable the forwarding over SSH on your Raspberry Pi.
Connecting from Windows
For connecting from Windows you need 2 tools – Putty and Xming.
Putty may be already there with you for having an SSH connection.
Install Xming and follow the below steps.
- Launch Putty and fill in the hostname (for example [email protected]).
- Now fill the saved session with any name.
- Go to Connection > SSH in the menu at the left. Check “enable X11 forwarding”
- Return to session and save it.
- Double-click on the new saved session to connect.
This will enable the X11 forwarding over SHH on your Pi.
Now you can launch any Raspberry application on Windows by issuing the below command. It will launch the Raspberry Pi Disk Manager on your desktop.
nohup baobab &Connecting from Linux & Mac
For both Linux and Mac, enabling remote access to raspberry pi is almost the same. You have to log in to SSH by giving a parameter as shown here.
ssh -X [email protected]Now enter your password and launch your application with the below command.
nohup <app name> &Replace the <app name> with the name of your desired application. This will open your application on your desktop.
#3. Remote Desktop with Team Viewer
Team Viewer is a renowned application for remote desktop access mostly used by non-techies. One advantage with Team Viewer is that we don’t have to open any specific port for enabling access. Though by default, it connects on port 5938 you can also use ports like 443, 80, etc if the former is not working.
Installation
Here I will show you how to install the ARM package of Team Viewer without visiting their download page.
1.First get the ARM package:
wget https://download.teamviewer.com/download/linux/teamviewer-host_armhf.deb2. Install it:
sudo dpkg -i teamviewer-host_armhf.deb3. If you encounter any dependency errors, fix them by running these commands.
sudo apt-get update
sudo apt-get -f install
4. Now set up a password to connect.
sudo teamviewer passwd YOURPASSWORDReplace YOURPASSWORD with a password of your choice.
5. Then you will get a Team Viewer ID for your Raspberry Pi. So note it down and connect as usual with that ID.
Connecting from Windows & Mac
For Windows and Mac Oses the procedure is the same.
- Download the standalone software from their official website and install it.
- Now launch it and connect with the Team Viewer ID and Password that you set. That’s it.
Connecting from Linux
- From Linux, first, you have to download the Team Viewer client from their website.
- Install it with the package manager and start it from the start menu.
- Log in if you have an account and fill in the Team Viewer ID and Partner ID and click on Connect.
- Type the password once prompted.
#4. Remote Desktop with VNC
VNC stands for Virtual Network Computing which is a system to share a graphical desktop similar to Xrdp. The only difference is that this will connect to the current session directly, while Xrdp connects to a new session.
Installation
Here we are going to install the RealVNC server on Raspberry Pi. (You can also get different VNC packages like UltraVNC, TightVNC, etc.)
1.First of all you have to update your repository. Do this by running the command below.
sudo apt-get update2. Install the RealVNC server package.
sudo apt-get install realvnc-vnc-server3. Now for enabling the VNC server starts the Raspbian configuration.
sudo raspi-config4. Go to interfacing options and select VNC, give Yes, and Select Finish to close.
So you have installed the VNC server and now let’s see how to install it on various Oses.
Connecting from Windows
- Download and install the RealVNC software from their website.
- Open the application and type the IP address of your Raspberry Pi and you will be connected.
Connecting from Linux
- Download RealVNC Viewer from the official website.
- If you go with one-time usage, leave the default settings as such. Otherwise, select the .deb or the .rpm (according to your OS) to get the shortcuts placed in the programs.
- Once installed, give the IP address of your Pi and validate it. Then you will be connected and bookmarked for connections in the future.
Connecting from Mac
This is very similar to connecting in Windows. You can download the Mac version of the RealVNC from here. Install it and follow the same steps as those in Windows.
#5. Remote Desktop with NoMachine
NoMachine is another remote desktop tool that is very similar to RealVNC.
Installation
- You can download the NoMachine package for Raspberry Pi from this link.
- Download and install the same with the following command.
wget https://download.nomachine.com/download/7.0/Raspberry/nomachine_7.0.211_1_armhf.deb sudo dpkg -i nomachine_7.0.211_1_armhf.deb - Replace the version number with the last one you get.
- The installation will begin and it will take a while.
Connecting from Windows/ Linux/ Mac
For NoMachine, the connection is similar to any OS.
- At first, download the NoMachine client corresponding to your OS from here.
- Install the package and launch it.
- NoMachine will automatically detect your Raspberry Pi on the network.
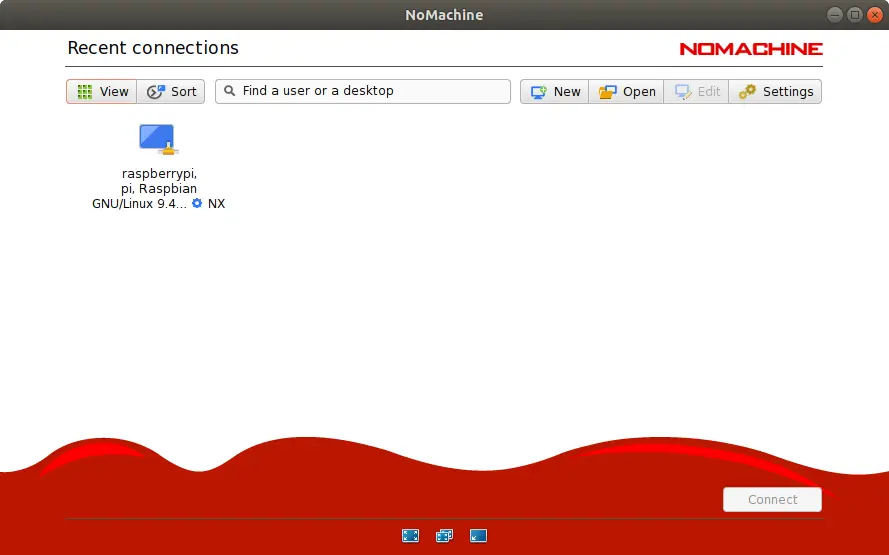
- Double click on the Raspberry Pi shown in NoMachine to connect.
- Give the credentials and you will be logged in.
Conclusion
I hope you learned to set up Raspberry Pi Remote Desktop using 5 different methods. Out of the 5 methods, my favorite is NoMachine.
So, which method is your favorite? Do comment below your thoughts and views.
Cheers..:)
Found an issue with this article? Report it here, so that I can resolve it.